Posts

Integrating Angular Application with Restful API

Image
From this topic we will update our angular todoList Application with Restful API's. Let's start with our welcome page and add a button, on clicking of that button we will call our webservice. Angular provide us HTTP client module which we are going to use using observable. Before starting make sure you java and angular application is started. Now go to your welcome.component.html to add a button as show below After adding button you have to add getWelcomeMessage() method in your welcome.commponent.ts file and print something for now in console. now if check from your localhost you can see it will print in the console Now we will connect the java service for that let's create a service in angular which will connect to backend java service, for creating a service we will command ng generate service service/data/welcomeData. Now create a method in welcome-data.service.ts file you have to use this service in your welcome component by using dependency injection and update your g

Hello World Service, Dispatcher Servlet and Auto Configuration

Image
In Previous topic we have installed eclipse and created on rest-webservice also we have seen our service was started with default port 8080 on default tomcat server. Let's create one Hello World service and we will simple return hello world as a string as well we will return a POJO from our service. For this let's crate one controller class as  HelloWorldController.class, first we need to tell spring that this class is controller class as we are working on rest application we can use @RestController annotation on this class. RestController is used for  making restful web services  with the help of the @RestController annotation. This annotation is used at the class level and allows the class to handle the requests made by the client or user. Let's create one method in controller class which will return String once created then we need to specify the mapping type of this method like whether it is a get request or post or any other. Here we are only returning a String so we c

Eclipse, Springboot Application, Webservice

Image
  In previous topics we have create simple angular application and put some hardcoded value. As this whole course is for angular application with springboot java we will now look forward to create simple springboot application. Let's start with webservice, as per W3C Definition of webservice: webservice is a software system designed to support interoperable machine to machine interaction over a network. Keys of webservice are : 1. Webservice are designed for application to application interaction. 2. Not platform dependent. 3. should allow communication over network. In This we are using rest webservice for our application. Before that you can download eclipse from  here  and JDK & JRE from  here  . Now we will create java application using spring initializer and import in eclipse. Go to  Spring Initializer  and create a project as shown below. Click on generate it will download the project now unzip at you project location. Now import project in eclipse as shown below: After i

Logout Component and Angular Router (CanActivate)

Image
  In this topic we will create our logout component for our application and also remove session object if user is logged out as well we will see the use of Angular Router method CanActivate. Now Let's create logout component using command "ng generate component logout"  once you create the logout component you have to add it in routing file i.e. app-routing.module.ts and add it before ** as ** will be the last thing in routing. After adding it here you can check it by clicking on logout button in your localhost URL. Now we will remove user from session storage for that we need to add one method in authentication service and use that method in logout component by dependency Injection. Till Now we have done the login, menu, error, logout so you can check it by going through localhost. but still we have one problem i.e. if we go to http://localhost:4200/welcome/dummy or todo or any menu item without logged in it is working so what do we need to do here? we need something whi

Authentication and Session Storage

Image
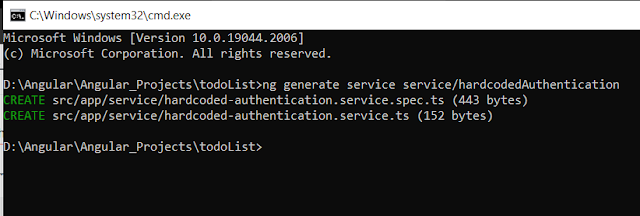
In this topic we will create our authentication service, use session storage and we will enable menu links based on user authentication. Let's create a service by using command "ng generate service foldername/servicefilename", always create services in a folder otherwise it will create everything in src folder and it is very difficult to track it. Now create our authentication service so the command will be "ng generate service service/hardcodedAuthentication", make sure you are in the project folder when you use the command. as shown below When you open this service file you can see it is a simple class except @Injectable,  it make this class as service and we can use this at any place of or project by importing it. Injectable make a class available for dependency injection Now add some method in this class. Now we use this Authentication service in our login component, for using this we have to add this in constructor  and now as we move the authentication par